Code ví dụ Swagger với springfox-swagger2, swagger ui
(Xem lại: Swagger là gì)
Trong bài này mình sẽ sử dụng lại Code ví dụ Spring Boot RESTful Webservice với các api thêm, sửa, xóa user và tạo tài liệu để import vào swagger.
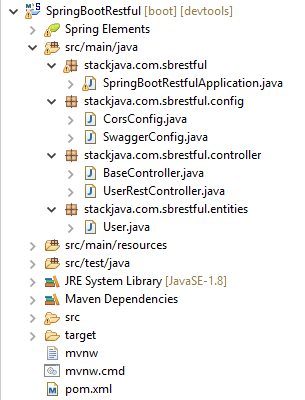
Tạo Spring Boot Project
Thư viện sử dụng
Để sử dụng swagger ta thêm 2 thư viện sau:
<dependency>
  <groupId>io.springfox</groupId>
  <artifactId>springfox-swagger2</artifactId>
  <version>2.8.0</version>
</dependency>
<dependency>
  <groupId>io.springfox</groupId>
  <artifactId>springfox-swagger-ui</artifactId>
  <version>2.8.0</version>
</dependency>
Thư viện springfox-swagger-ui giúp bạn nhúng sẵn phần mềm swagger-ui vào project, phần mềm swagger ui sẽ được start cùng project.

Cấu hình swagger
package stackjava.com.sbrestful.config;
import org.springframework.context.annotation.Bean;
import org.springframework.context.annotation.Configuration;
import springfox.documentation.builders.ApiInfoBuilder;
import springfox.documentation.builders.PathSelectors;
import springfox.documentation.builders.RequestHandlerSelectors;
import springfox.documentation.service.ApiInfo;
import springfox.documentation.service.Contact;
import springfox.documentation.spi.DocumentationType;
import springfox.documentation.spring.web.plugins.Docket;
import springfox.documentation.swagger2.annotations.EnableSwagger2;
@Configuration
@EnableSwagger2
public class SwaggerConfig {
@Bean
public Docket api() {
return new Docket(DocumentationType.SWAGGER_2)
.apiInfo(getApiInfo())
.select()
.apis(RequestHandlerSelectors.basePackage("stackjava.com.sbrestful.controller"))
.paths(PathSelectors.any())
.build();
}
private ApiInfo getApiInfo() {
Contact contact = new Contact("stackjava.com", "https://stackjava.com", "cuong.9312@gmail.com");
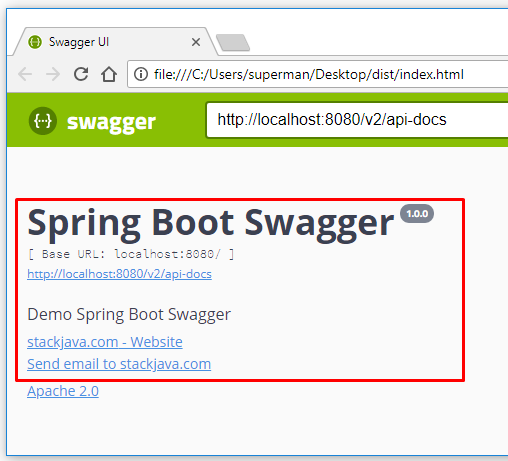
return new ApiInfoBuilder()
.title("Spring Boot Swagger")
.description("Demo Spring Boot Swagger")
.version("1.0.0")
.license("Apache 2.0")
.licenseUrl("http://www.apache.org/licenses/LICENSE-2.0")
.contact(contact)
.build();
}
}
- Bean Docket sẽ xác định các class trong package nào được tạo document, thông tin là gì… (ví dụ ở đây mình tạo document cho các class trong package
stackjava.com.sbrestful.controller) - Method getApiInfo() sẽ trả về thông tin hiển thị trên swagger:
File entity
package stackjava.com.sbrestful.entities;
import io.swagger.annotations.ApiModelProperty;
public class User {
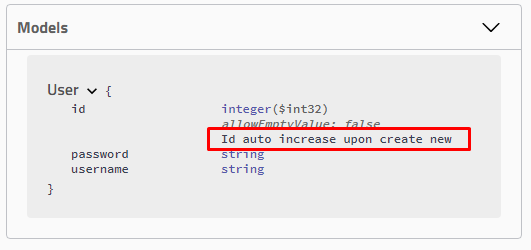
@ApiModelProperty(notes = "Id auto increase upon create new")
private int id;
private String username;
private String password;
// getter - setter
}
- Annotation @ApiModelProperty dùng để giải thích các field của model trên swagger:
Ví dụ trên swagger, class User sẽ hiển thị như sau:
File Controller
package stackjava.com.sbrestful.controller;

import java.util.ArrayList;
import java.util.HashMap;
import java.util.List;

import org.springframework.http.HttpStatus;
import org.springframework.http.MediaType;
import org.springframework.http.ResponseEntity;
import org.springframework.web.bind.annotation.PathVariable;
import org.springframework.web.bind.annotation.RequestBody;
import org.springframework.web.bind.annotation.RequestMapping;
import org.springframework.web.bind.annotation.RequestMethod;
import org.springframework.web.bind.annotation.RestController;

import io.swagger.annotations.Api;
import io.swagger.annotations.ApiOperation;
import io.swagger.annotations.ApiResponse;
import io.swagger.annotations.ApiResponses;
import stackjava.com.sbrestful.entities.User;

@RestController
@RequestMapping("/rest")
@Api(tags = "Users Rest Controller")
public class UserRestController {

  public static HashMap<Integer, User> mapUser = new HashMap<Integer, User>();
  static {
    mapUser.put(1, new User(1, "kai", "123456"));
    mapUser.put(2, new User(2, "admin", "admin1234"));
    mapUser.put(3, new User(3, "sena", "123456"));
    mapUser.put(4, new User(4, "peter", "1234"));
  }

  @RequestMapping(value = "/users", method = RequestMethod.GET, produces= MediaType.APPLICATION_JSON_UTF8_VALUE)
  @ApiOperation(value = "Get all users", tags = "Users Rest Controller")
  @ApiResponses(value = { @ApiResponse(code = 200, message = "Success"),
      @ApiResponse(code = 400, message = "Bad request"),
      @ApiResponse(code = 500, message = "Internal server error") })
  public ResponseEntity<List<User>> getAllUser() {
    List<User> listUser = new ArrayList<User>(mapUser.values());
    return new ResponseEntity<List<User>>(listUser, HttpStatus.OK);
  }

  @ApiOperation(value = "Get User By ID", tags = "Users")
  @ApiResponses(value = { @ApiResponse(code = 200, message = "Success"),
      @ApiResponse(code = 400, message = "Bad request"),
      @ApiResponse(code = 500, message = "Internal server error") })
  @RequestMapping(value = "/users/{id}", method = RequestMethod.GET)
  public ResponseEntity<Object> getUserById(@PathVariable int id) {
    User user = mapUser.get(id);
    if (user != null) {
      return new ResponseEntity<Object>(user, HttpStatus.OK);
    }
    return new ResponseEntity<Object>("Not Found User", HttpStatus.NO_CONTENT);
  }

  @ApiOperation(value = "Create new User")
  @ApiResponses(value = { @ApiResponse(code = 200, message = "Success"),
      @ApiResponse(code = 400, message = "Bad request"),
      @ApiResponse(code = 500, message = "Internal server error") })
  @RequestMapping(value = "/users", method = RequestMethod.POST)
  public ResponseEntity<String> createUser(@RequestBody User user) {
    if (mapUser.containsKey(user.getId())) {
      return new ResponseEntity<String>("User Already Exist!", HttpStatus.CONFLICT);
    }
    mapUser.put(user.getId(), user);
    return new ResponseEntity<String>("Created!", HttpStatus.CREATED);
  }

  @ApiOperation(value = "Delete User")
  @ApiResponses(value = { @ApiResponse(code = 200, message = "Success"),
      @ApiResponse(code = 400, message = "Bad request"),
      @ApiResponse(code = 500, message = "Internal server error") })
  @RequestMapping(value = "/users/{id}", method = RequestMethod.DELETE)
  public ResponseEntity<String> deleteUserById(@PathVariable int id) {
    User user = mapUser.get(id);
    if (user == null) {
      return new ResponseEntity<String>("Not Found User", HttpStatus.OK);
    }

    mapUser.remove(id);
    return new ResponseEntity<String>("Deleted!", HttpStatus.OK);
  }

  @ApiOperation(value = "Update User")
  @ApiResponses(value = { @ApiResponse(code = 200, message = "Success"),
      @ApiResponse(code = 400, message = "Bad request"),
      @ApiResponse(code = 500, message = "Internal server error") })
  @RequestMapping(value = "/users", method = RequestMethod.PUT)
  public ResponseEntity<String> updateUser(@RequestBody User user) {
    User oldUser = mapUser.get(user.getId());
    if (oldUser == null) {
      return new ResponseEntity<String>("Not Found User", HttpStatus.NO_CONTENT);
    }
    mapUser.put(user.getId(), user);
    return new ResponseEntity<String>("Updated!", HttpStatus.OK);
  }

}
- Annotation @Api(tags = “Users Rest Controller”) dùng để nhóm tất cả các api (method) trong class thành một nhóm:
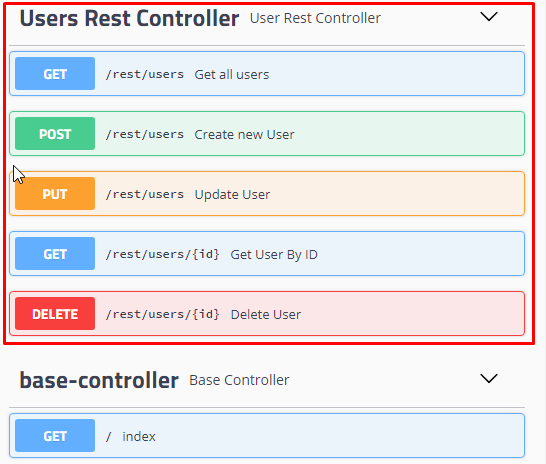
- Annotation @ApiOperation dùng để chỉ rõ method nào sẽ được tạo document:
- value: mô tả chức năng của method
- tags: khai báo nhóm cho
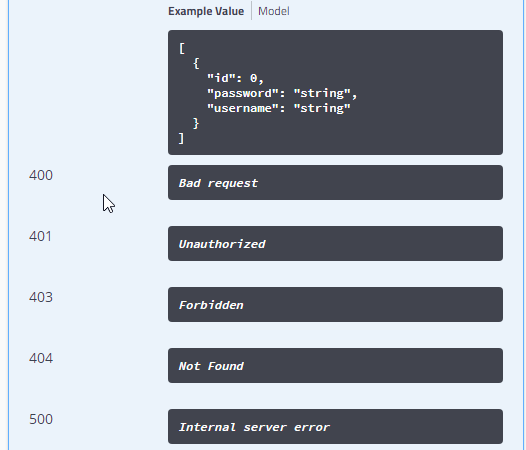
- annotation @ApiResponses dùng để chỉ rõ code và message trả về
Ví dụ mô tả của method getAllUser trên swagger sẽ như sau:
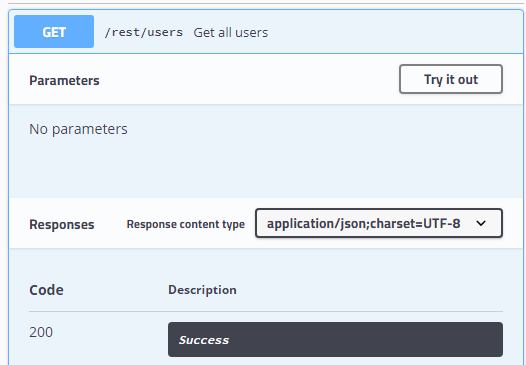
Trong trường hợp bạn muốn giải thích các paramater trong request thì ta có thể dùng annotation @ApiImplicitParams
Ví dụ trong method getAllUser mình muốn truyền thêm thông tin page và size để phân trang kết quả trả về thì mình sẽ dùng thêm annotation sau trước method getAllUser
@ApiImplicitParams(
        value = {
                @ApiImplicitParam(name = "page", value = "page number start from 0", dataType = "integer",
                        examples = @Example(@ExampleProperty("1")), paramType = "query"),
                @ApiImplicitParam(name = "size", value = "maximum number of item in page", dataType = "integer",
                        examples = @Example(@ExampleProperty("40")), paramType = "query"),
        }
)

Config Cors
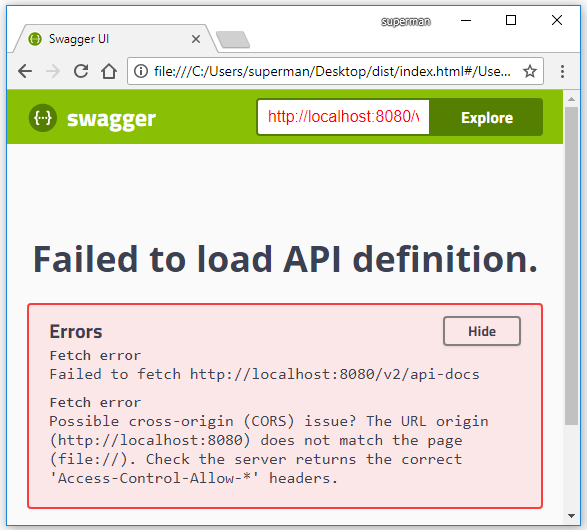
Trong trường hợp phần mềm swagger và project của bạn không cùng địa chỉ, ta cần enable cors để cho phép swagger có thể gửi ajax tới project spring boot.
Ví dụ trong trường hợp mình chạy phần mềm swagger ui riêng rồi start project spring boot riêng, nếu không enable cors thì sẽ gặp lỗi sau:
package stackjava.com.sbrestful.config;

import org.springframework.context.annotation.Bean;
import org.springframework.context.annotation.Configuration;
import org.springframework.web.cors.CorsConfiguration;
import org.springframework.web.cors.UrlBasedCorsConfigurationSource;
import org.springframework.web.filter.CorsFilter;
import org.springframework.web.servlet.config.annotation.CorsRegistry;
import org.springframework.web.servlet.config.annotation.WebMvcConfigurer;

@Configuration
public class CorsConfig implements WebMvcConfigurer {

  @Override
  public void addCorsMappings(CorsRegistry registry) {
    registry.addMapping("/**");
  }

  @Bean
  public CorsFilter corsFilter() {
    UrlBasedCorsConfigurationSource source = new UrlBasedCorsConfigurationSource();
    // Allow anyone and anything access. Probably ok for Swagger spec
    CorsConfiguration config = new CorsConfiguration();
    config.setAllowCredentials(true);
    config.addAllowedOrigin("*");
    config.addAllowedHeader("*");
    config.addAllowedMethod("*");
    source.registerCorsConfiguration("/v2/api-docs", config);
    return new CorsFilter(source);
  }
}
Demo:
Sau khi cấu hình xong swagger và start project, mặc định thông tin swagger sẽ được tạo ra ở url: http://localhost:8080/v2/api-docs
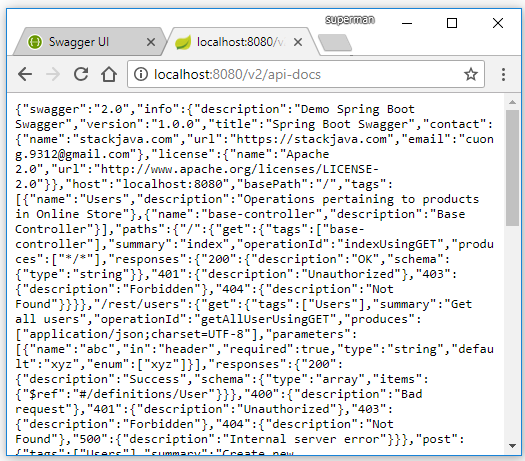
Bây giờ bạn chỉ cần nhập http://localhost:8080/v2/api-docs vào ô input explorer của swagger là nó sẽ tạo document api cho bạn:

Hoặc bạn có thể chạy swagger trên project với url localhost:8080/swagger-ui.html
Ví dụ thực hiện kiểm tra, chạy thử api get all users trên swagger:
Ví dụ thực hiện lấy thông tin của user có id = 1
Với những trường hợp put, post các bạn thêm data giống vào body, nhìn chung swagger hoạt động giống hệt như một rest client (ví dụ như postman)
Code ví dụ Swagger với springfox-swagger2, swagger ui stackjava.com
Okay, Done!
Download code ví dụ trên tại đây.
References:
