Monstache là gì? Đồng bộ mongodb sang Elasticsearch với Monstache
(Xem thêm: Hướng dẫn Elasticsearch)
Monstache là gì?
Monstache là một công cụ, phần mềm thực hiện đồng bộ dữ liệu từ MongoDB sang Elasticsearch.
Monstache khá giống với Transporter tuy nhiên nó thực hiện đồng bộ dữ liệu một cách realtime, tức là khi có bất kỳ thay đổi dữ liệu nào trên MongoDB (thêm/sửa/xóa) nó sẽ tự động cập nhật tới Elasticsearch.
Việc sử dụng Monstache được áp dụng khi bạn muốn kết hợp MongoDB với Elasticsearch. Ví dụ bạn dùng MongoDB để lưu dữ liệu nhưng khi thực hiện query thì query trên Elasticsearch vì Elasticsearch hỗ trợ search tốt hơn MongDB ở nhiều trường hợp khác nhau.
Cài đặt Monstache
Yêu cầu đã cài đặt MongoDB và Elasticsearch. Vì Monstache được viết bằng ngôn ngữ lập trình Golang nên cần phải cài Golang nữa nhé.
Ở ví dụ này mình sẽ cài đặt trên Ubuntu 16.04 (Các bạn có thể cài trên windows cũng được nhé)
(Xem lại: Cài đặt MongoDB trên Ubuntu, Cài đặt Elasticsearch trên Ubuntu, Cài đặt Golang trên Ubuntu)
Lưu ý: phải bật chức năng oplog trên MongoDB lên, vì oplog sẽ chứa tất cả thông tin về các thay đổi của MongoDB và monstache sẽ dựa trên sự thay đổi đó để đồng bộ dữ liệu sang Elasticsearch, để bật chức năng oplog ta có 2 cách như sau:
- Cài đặt Replica Set (Xem lại: Cài đặt Replica Set trên MongoDB)
- Thêm tham số
--mastervào sau lệnhmongodkhi khởi động MongoDB
Bước 1: Download Monstache tại https://github.com/rwynn/monstache/releases
Lưu ý: phiên bản monstache từ 4.x mới hỗ trợ bản ES6+ (Elasticsearch phiên bản 6 trở nên) còn monstache 3.x chỉ hỗ trợ ES2-5.
Trong ví dụ này mình download bản monstache-4.8.0.zip
Download file trên và giải nén về, bạn sẽ thấy nó có cả 3 mục cho windows, linux và macOS
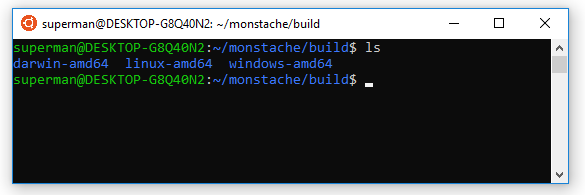
Mình sử dụng trên ubuntu nên sẽ vào folder linux-adm64, các bạn sẽ thấy file monstache (monstache là file binary nha) và file conf.properties dùng để cấu hình thông tin MongoDB và Elasticsearch, nếu chưa có file này thì bạn tự tạo mới nhé.

Thêm đường dẫn của thư mục chứa file monstache vào biến PATH
Ví dụ trong trường hợp của mình sẽ là:
PATH="$HOME/bin:$HOME/.local/bin:$HOME/monstache/build/linux-amd64:$PATH"
(Xem lại: Cài đặt, tạo biến môi trường trên Ubuntu, biến $PATH)
Sau khi thêm vào biến PATH thành công chúng ta có thể chạy monstache với lệnh monstache
Ví dụ kiểm tra version monstache: bằng lệnh monstache -v
Cấu hình monstache bằng file conf.properties
Thông tin file conf.properties có dạng như sau:
# connection settings

# connect to MongoDB using the following URL
mongo-url = "mongodb://someuser:password@localhost:40001"
# connect to the Elasticsearch REST API at the following node URLs
elasticsearch-urls = ["https://es1:9200", "https://es2:9200"]

# frequently required settings

# if you don't want to listen for changes to all collections in MongoDB but only a few
# e.g. only listen for inserts, updates, deletes, and drops from mydb.mycollection
# this setting does not initiate a copy, it is a filter on the change listener only
namespace-regex = '^mydb\.mycollection$'
# additionally, if you need to seed an index from a collection and not just listen for changes from the oplog
# you can copy entire collections from MongoDB to Elasticsearch
direct-read-namespaces = ["mydb.mycollection", "db.collection", "test.test"]

# additional settings

# compress requests to Elasticsearch
gzip = true
# generate indexing statistics
stats = true
# index statistics into Elasticsearch
index-stats = true
# use the following PEM file for connections to MongoDB
mongo-pem-file = "/path/to/mongoCert.pem"
# disable PEM validation
mongo-validate-pem-file = false
# use the following user name for Elasticsearch basic auth
elasticsearch-user = "someuser"
# use the following password for Elasticsearch basic auth
elasticsearch-password = "somepassword"
# use 4 go routines concurrently pushing documents to Elasticsearch
elasticsearch-max-conns = 4
# use the following PEM file to connections to Elasticsearch
elasticsearch-pem-file = "/path/to/elasticCert.pem"
# validate connections to Elasticsearch
elastic-validate-pem-file = true
# propogate dropped collections in MongoDB as index deletes in Elasticsearch
dropped-collections = true
# propogate dropped databases in MongoDB as index deletes in Elasticsearch
dropped-databases = true
# do not start processing at the beginning of the MongoDB oplog
# if you set the replay to true you may see version conflict messages
# in the log if you had synced previously. This just means that you are replaying old docs which are already
# in Elasticsearch with a newer version. Elasticsearch is preventing the old docs from overwriting new ones.
replay = false
# resume processing from a timestamp saved in a previous run
resume = true
# do not validate that progress timestamps have been saved
resume-write-unsafe = false
# override the name under which resume state is saved
resume-name = "default"
# exclude documents whose namespace matches the following pattern
namespace-exclude-regex = '^mydb\.ignorecollection$'
# turn on indexing of GridFS file content
index-files = true
# turn on search result highlighting of GridFS content
file-highlighting = true
# index GridFS files inserted into the following collections
file-namespaces = ["users.fs.files"]
# print detailed information including request traces
verbose = true
# enable clustering mode
cluster-name = 'apollo'
# do not exit after full-sync, rather continue tailing the oplog
exit-after-direct-reads = false
Trong đó:
mongo-urllà url tới database MongoDBelasticsearch-urlslà url tới các server elasticsearch mà bạn muốn đồng bộ với MongoDBdirect-read-namespaceslà các database, collection của MongoDB sẽ được đồng bộ hóa- Ngoài ra ở dưới còn các thông tin khác như username/password của Elasticsearch…
Demo
Ở đây mình sử dụng luôn MongoDB và Elasticsearch trên local với url lần lượt là:
mongo-url = "mongodb://localhost:27017"

elasticsearch-urls = ["https://localhost:9200"]

direct-read-namespaces = ["stackjava.player"]
Mình sẽ tiến hành đồng bộ dữ liệu từ collection player của database stackjava sang Elasticsearch
Khởi động elasticsearch bằng lệnh sudo service elasticsearch startvà chạy monstache bằng lệnh monstache
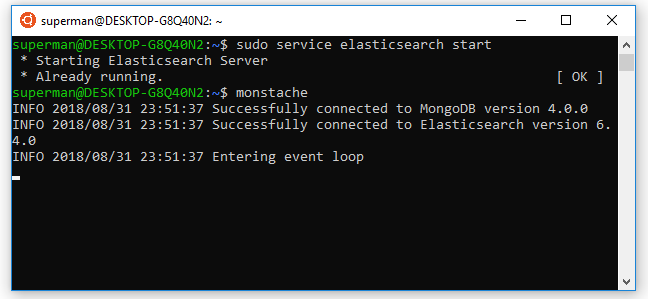
Nhớ giữ nguyên màn hình teminal chạy monstache nhé hoặc bạn cũng có thể tạo service để chạy ngầm monstache
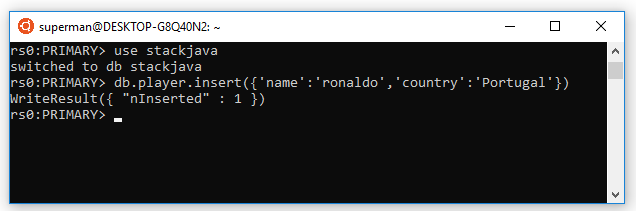
Insert dữ liệu vào stackjava.player
db.player.insert({'name':'ronaldo','country':'Portugal'})
Xem dữ liệu trên Elasticsearch:
curl http://localhost:9200/stackjava.player/_search?pretty
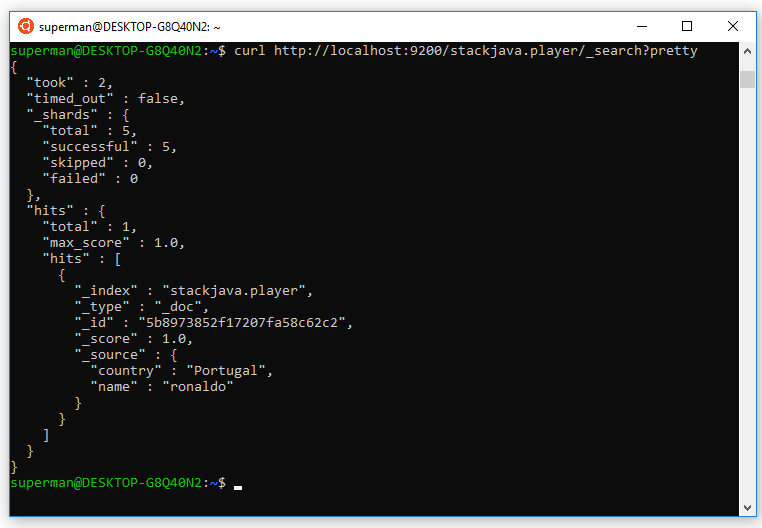
Kết quả trên Elasticsearchsẽ có thêm bản ghi mà bạn vừa thêm ở MongoDB, tương tự bạn có thể thêm bản ghi mới, xóa hoặc chỉnh sửa bản ghi trên MongoDB nó cũng sẽ đều cập nhật luôn sang Elasticsearch.
_____________________________________
Như vậy là mình đã hướng dẫn xong Monstache là gì? Đồng bộ mongodb sang Elasticsearch với Monstache.
Nếu bạn muốn sử dụng Monstache trên windows thì mình sẽ giới thiệu ở bài sau nhé.
Okay, Done!
References:
